The Bikerumor team has done a lot of bikepacking touring since the start of the year. With writers & contributors who have done traditional loaded touring mostly on pavement and dirt roads across Europe, the US, New Zealand, and South Africa, we wanted to venture a bit more off the beaten track with the advent of more dirt friendly options these days. We spoke with the folks with Revelate bags at the end of last year about outfitting a pair of our test riders who were heading down to Mexico to ride the Baja Divide. With Revelate’s bags designed in Alaska and made in Oregon, we wanted to see how they would hold up a bit farther south. We’re doing this review in two parts as there is a ton to see with the full suite of packs to out fit our two rider, so this one will start with an overview of the bags and their setup. Then we’ll come back later with how they fared, and all the great scenery they saw along the way…
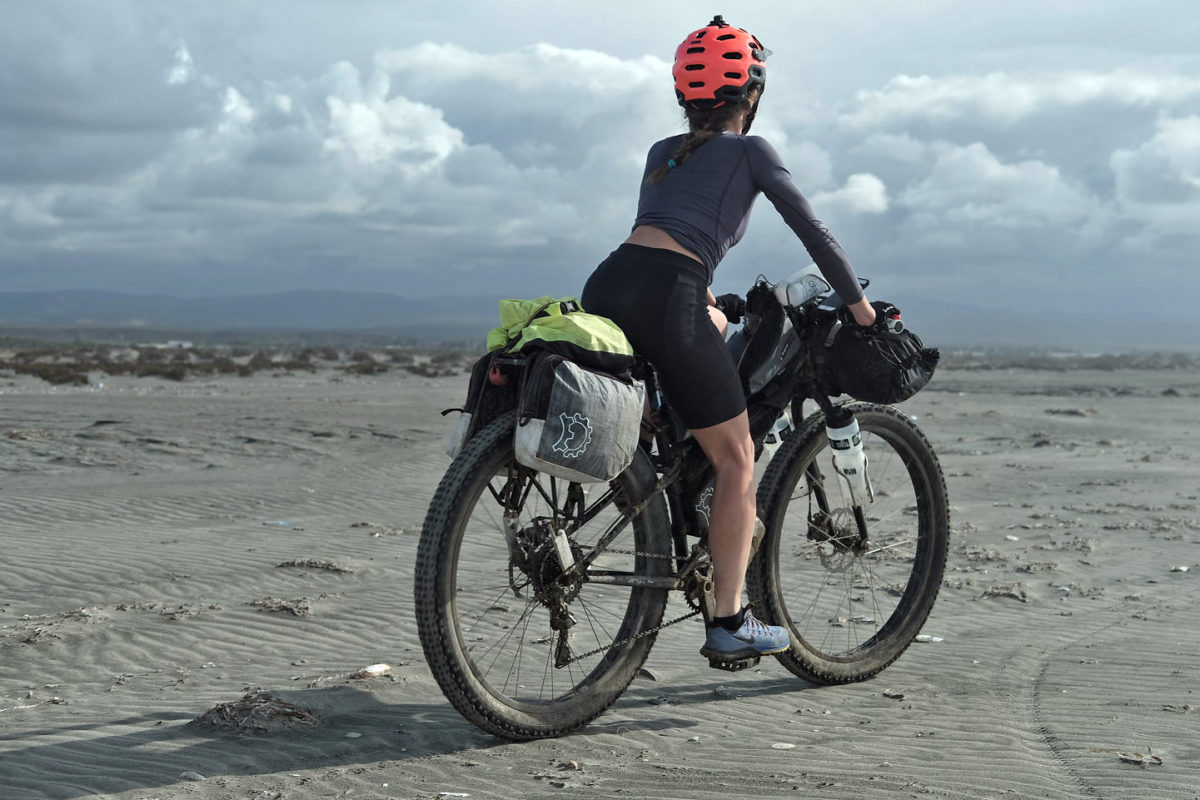
Our pair of Spencer & Katya heard about the Baja Divide and were pretty much sold instantly on a couple of months of long riding vacation away from life in New York City and into the sun & sand of the Baja peninsula. To start out the adventure they bought a matching pair of 29+ Surly Krampuses set up almost the same component wise, but which necessitated two unique bag setups due to their differing sizes. Two people from NYC, ready to leave the cold metropolis behind for the barren desert ahead. So on New Year’s Day they hopped on a plane to go meet almost 100 other bikepackers for the Grand Departure in San Diego.
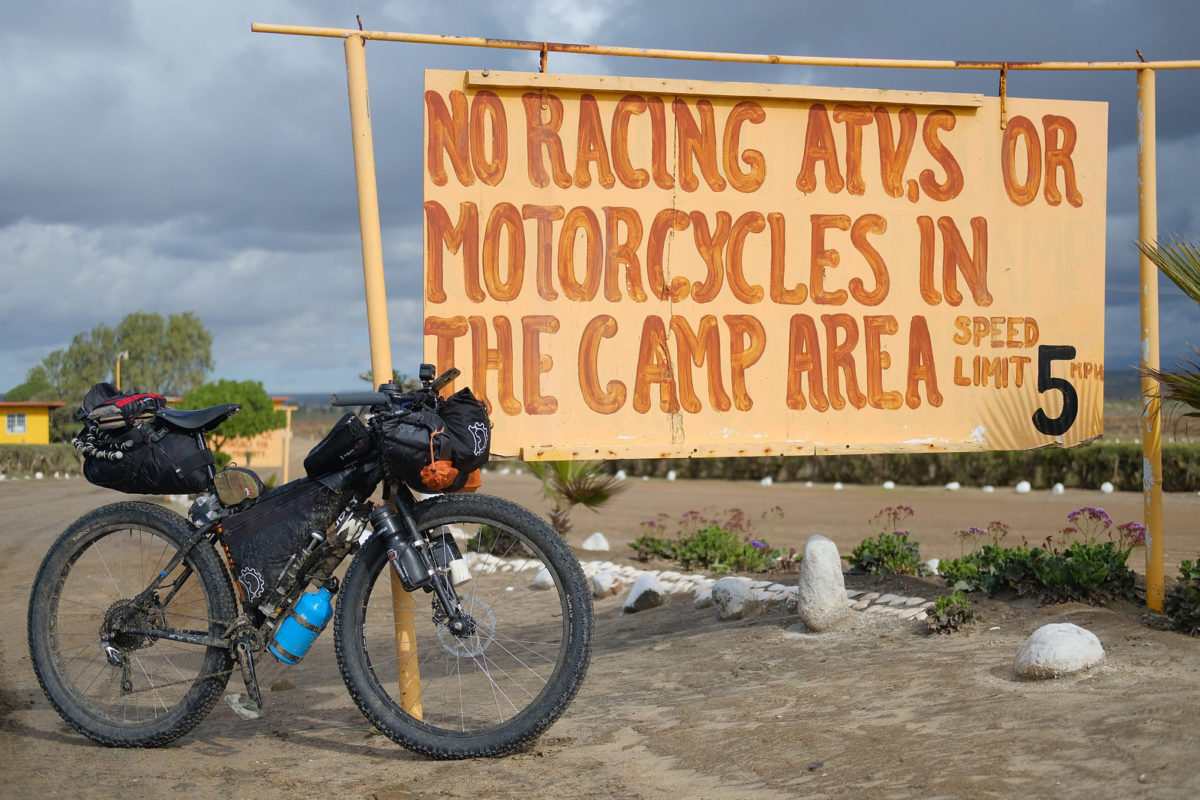
To set up the bikes for a months-long off-road adventure tour it took a couple big boxes worth of Revelate Designs packs, just about a week before departure, and a full afternoon to fit it all together. The idea was essentially that between the two Krampuses we’d be sporting the full Revelate bikepacking range: handlebar bags, seat pack, frame bags, gas tanks, jerry cans, and their new ‘prototypish’ macro panniers. The latter of which got a lot of attention throughout the tour. No better way to see the response from your target demographic then with 90 bikepackers all riding a new route together. A pretty smart move from the Revelate marketing team as we look back on it.
Revelate Designs knows what they are doing. They are one of the first real bikepacking manufacturing companies, starting off as a few guys with sewing machines in the lovely city of Anchorage, Alaska back in 2007. They’ve really been one of the first innovators in this weird & wonderful subdivision of cycling, and it showed in the details of the products we were riding.

From a planning and logistics standpoint, the key driving concern to the 1,700 mile Baja Divide is actually resupply. While food is always a concern on any backcountry trek, water is key on this route. So, key that we were told that there are some sections where you are required to carry at least 10 liters of water, per person. 1 liter water = 1 kilo, 1 kilo = 2.2 pounds 2.2 pounds x 10… you get the idea. So on top of all the food, clothes, camping gear, tools and beer that we planned to haul we needed a lot of space for all the water. That’s not so difficult when your bike is sporting front and rear panniers, handlebar bags and a rear top bag – riding on nicely paved roads… But, trying to fit all of that gear in the a mass centralized configuration isn’t that easy. That’s where we leaned on Revelate’s expertise & experience and how we ended up with so many bags.
So now looking more at the bags in the two bike setups themselves…
Spencer
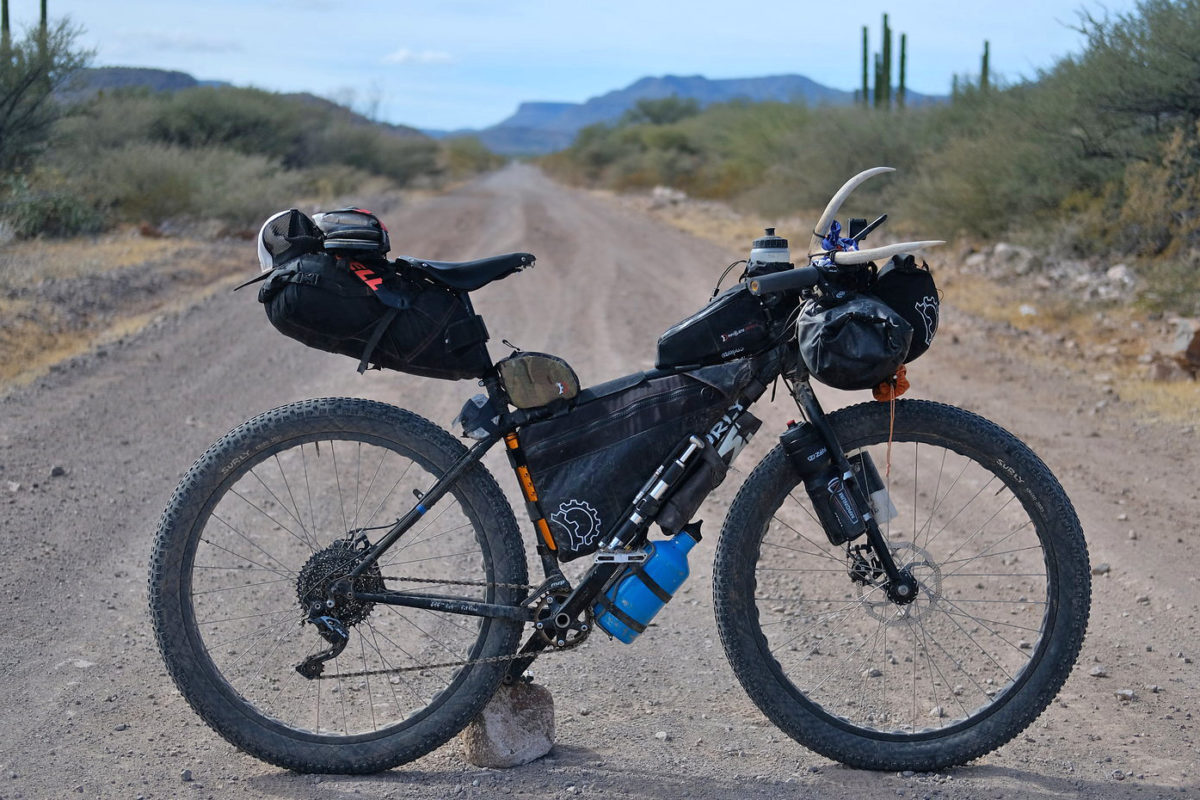
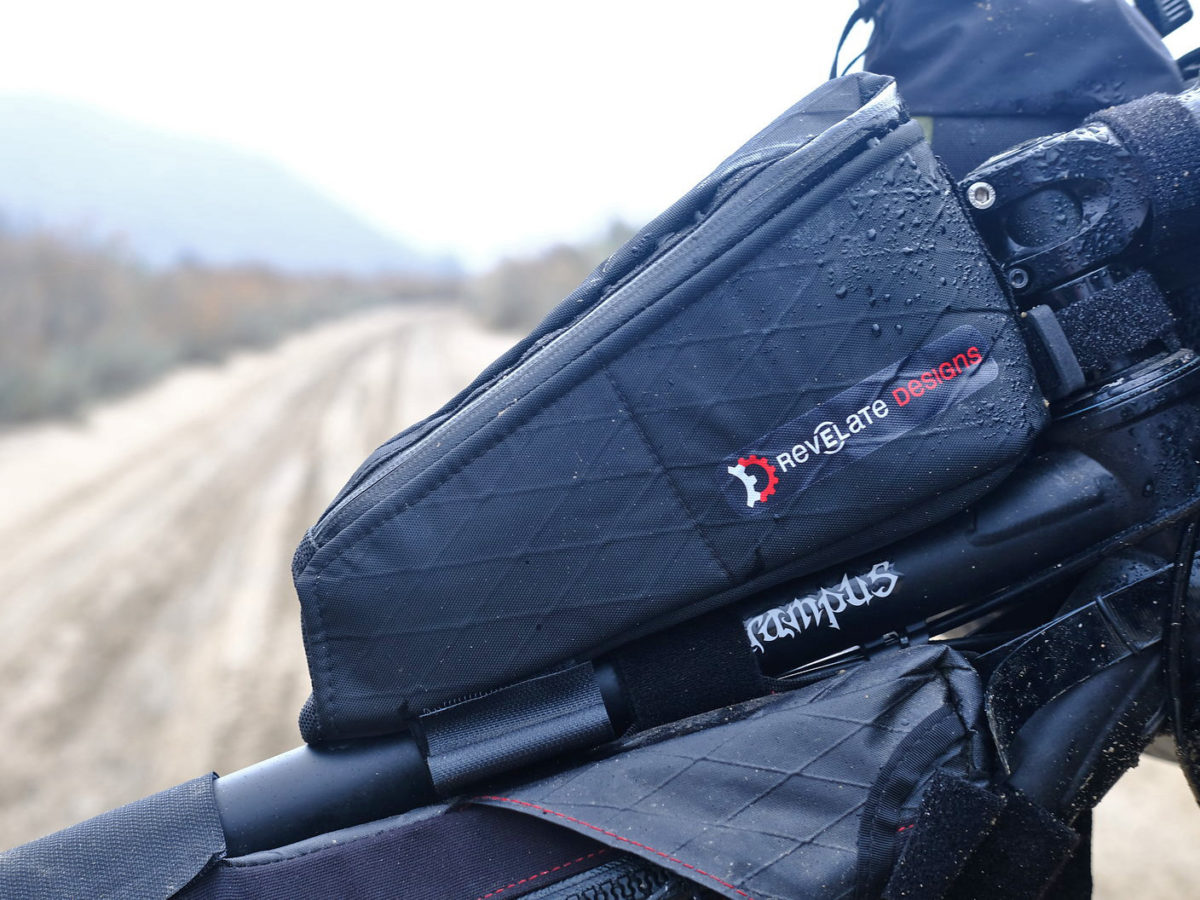
Spencer’s bike was the easier to sort out of the two. With the Large size Surly there was plenty of room to fit pretty much whatever was available, so he got the complete full kit. That meant a large Ranger frame bag, the big Viscacha saddle bag, a Sweetroll handlebar bag, and Gas Tank, Mountain Feedbag & Jerrycan accessory bags.
Ranger
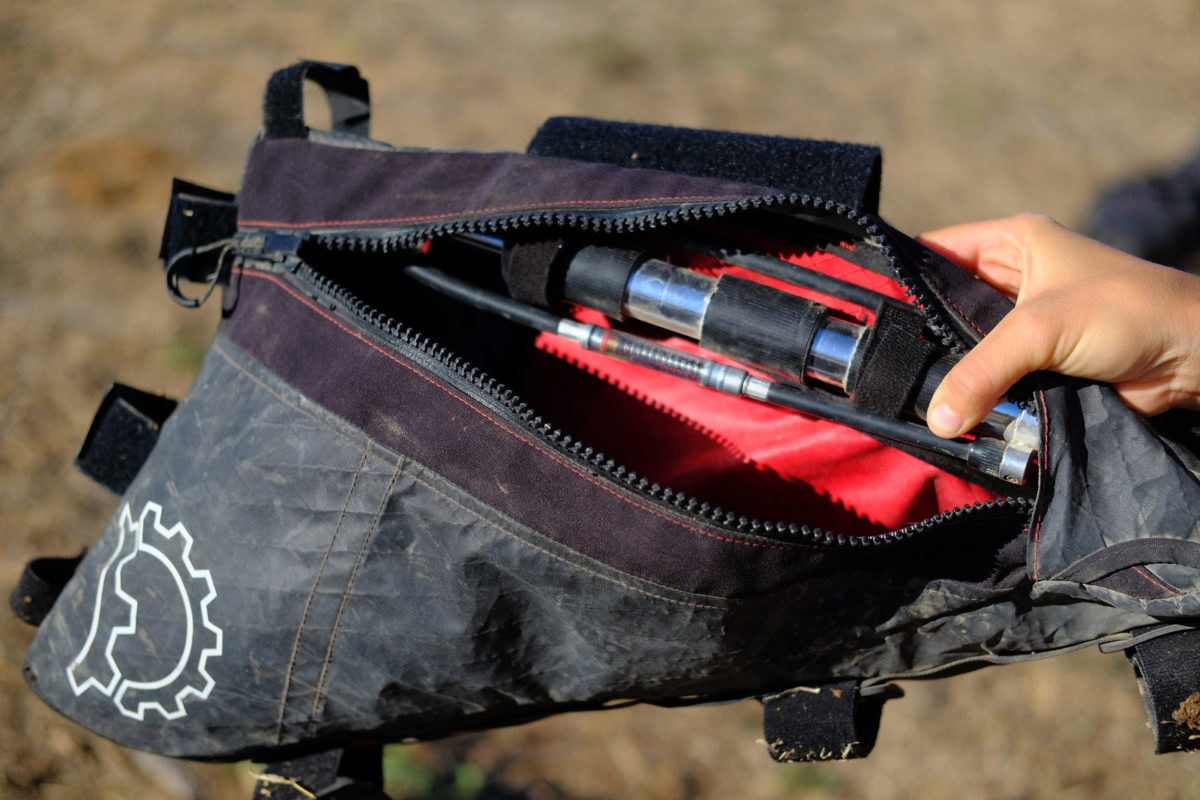
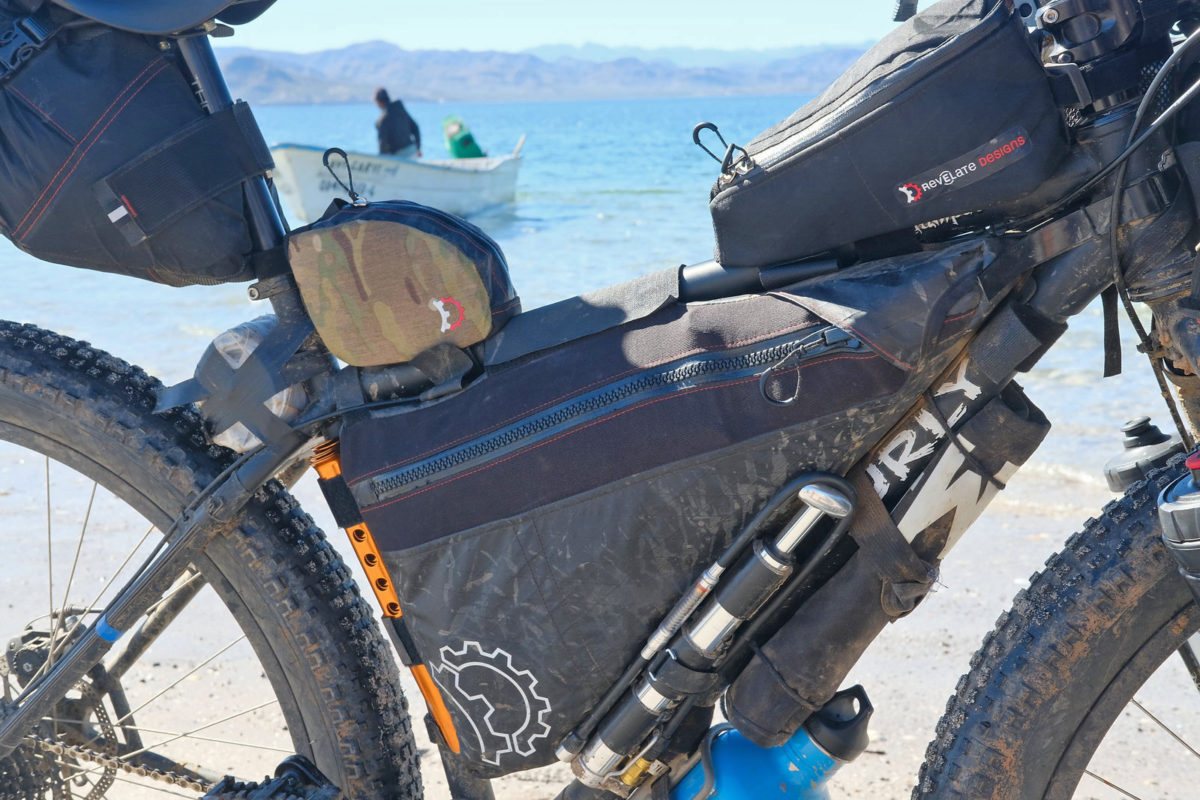
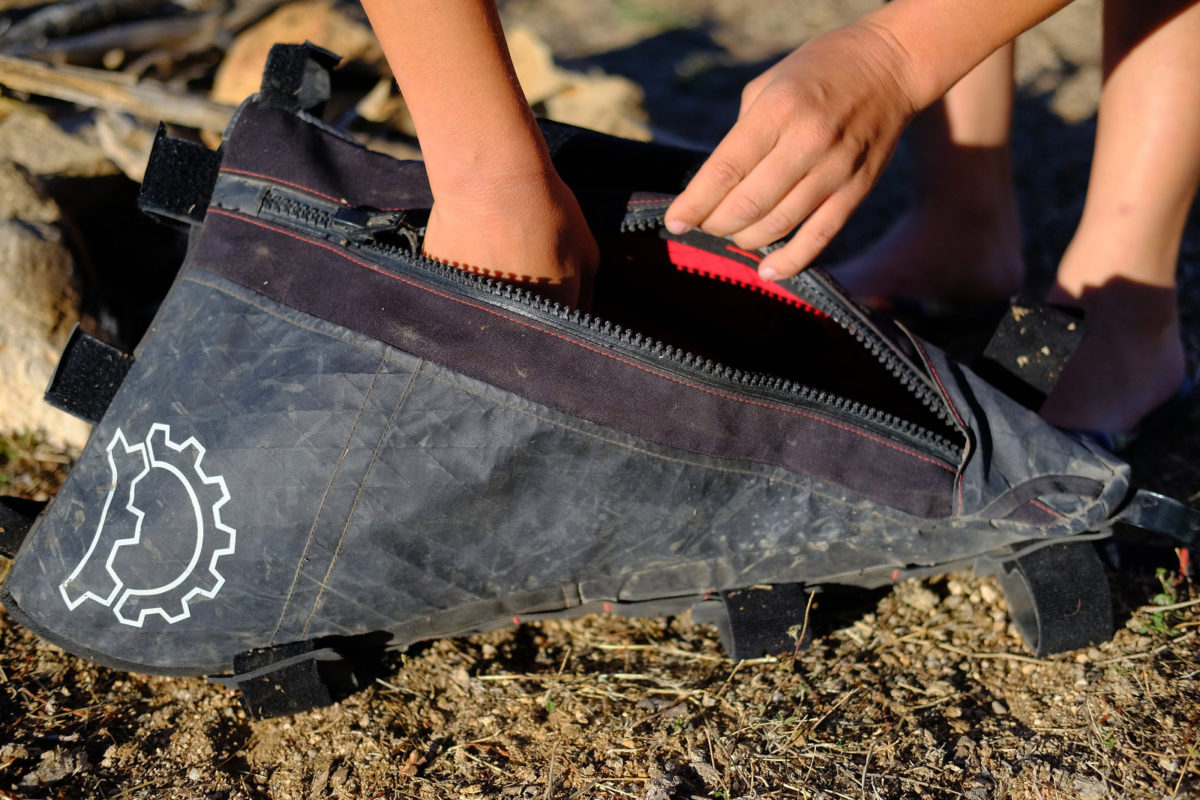
The $150 Ranger frame bag filled our front triangles completely – in a large for Spencer. It gets an oversized zipper on the driveside main body compartment that makes it easy to access on the go, plus a thin pocket on the other side and internal dividers that works for smaller items.
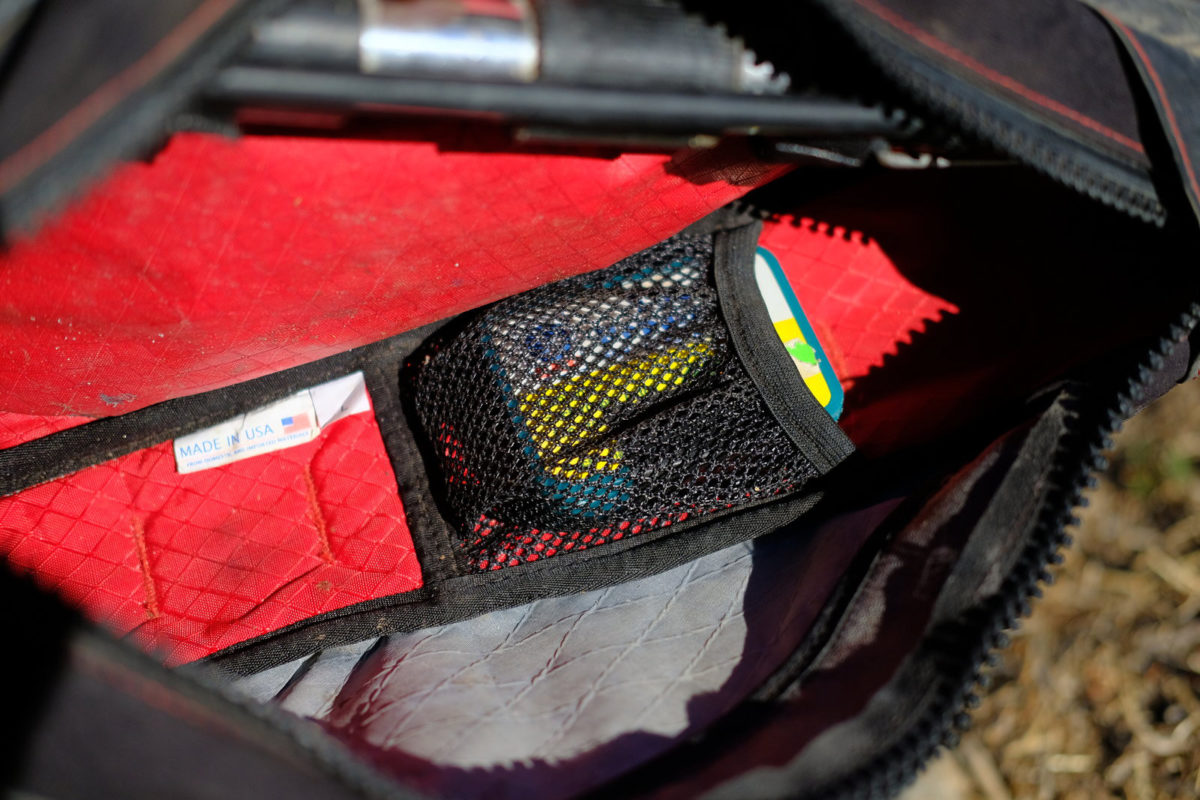
Inside the red-lined main pocket are mesh pouches, attachment straps, and an adjustable divider that helped organize our gear. Storage in this not entirely waterproof bag essentially depends on frame size, but this one hauled a ton. It velcroed around the frame, working well to interface smoothly with the other bags.
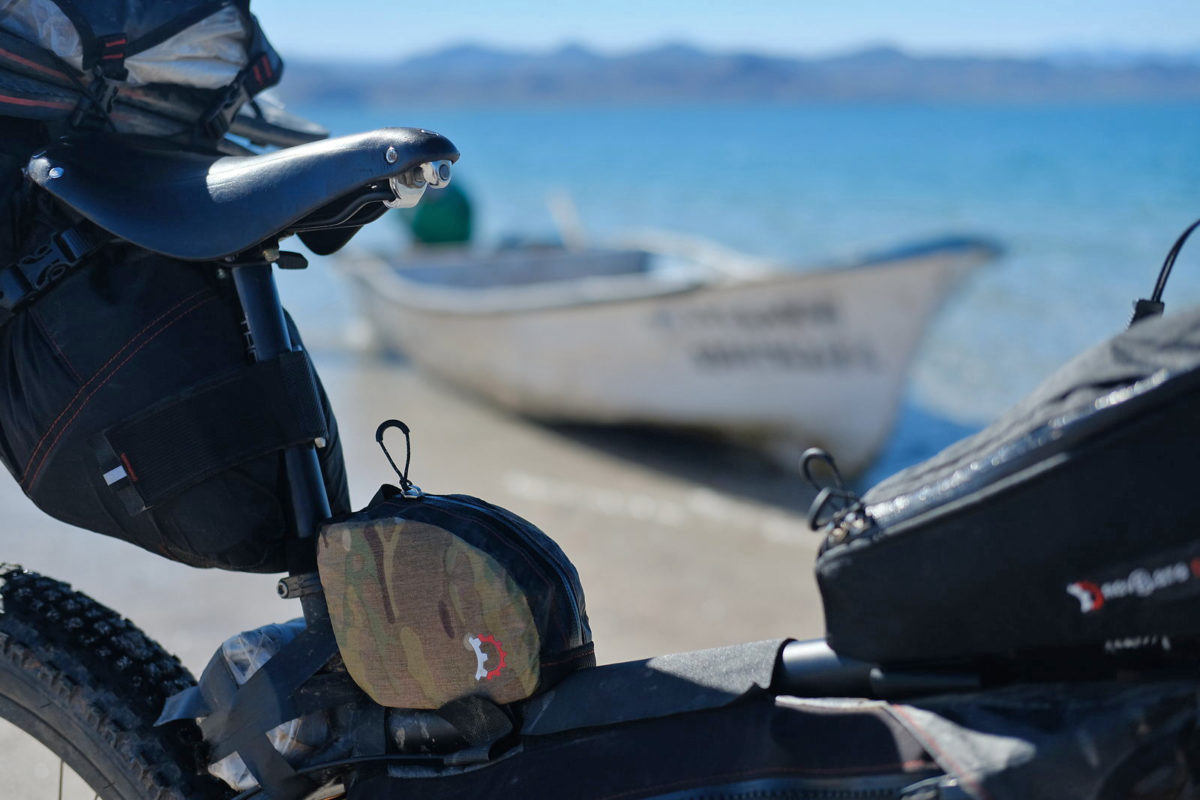
Viscacha
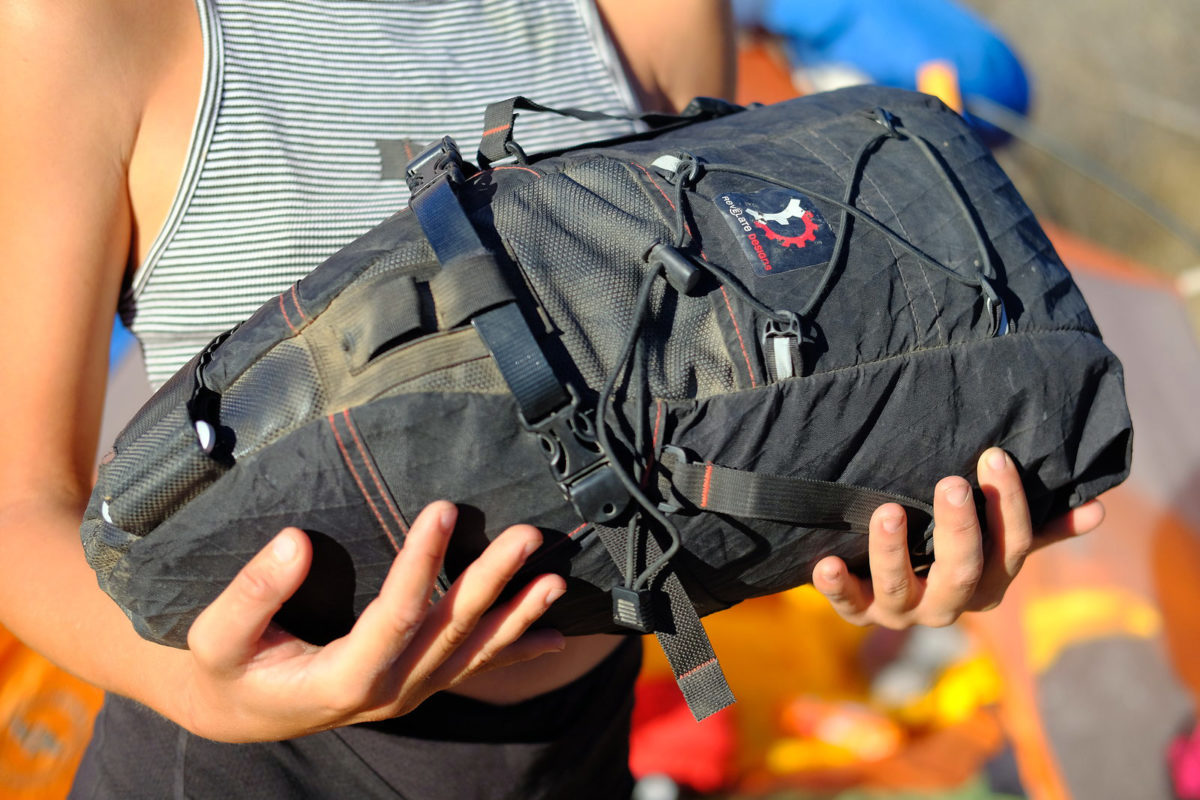
The Viscacha saddle bag is a big $130 gear hauler. Revelate tested the bag on the Iditarod trial, then the Great Divide, and now we took it to Mexico. It uses a roll up dry bag closure that adjusts from 6-14l of expandable hauling with a plastic insert for a bit of structure.

A wide seatpost strap secured it to our alloy post and a urethane-coated saddle rail strap stuck it securely under the saddle.
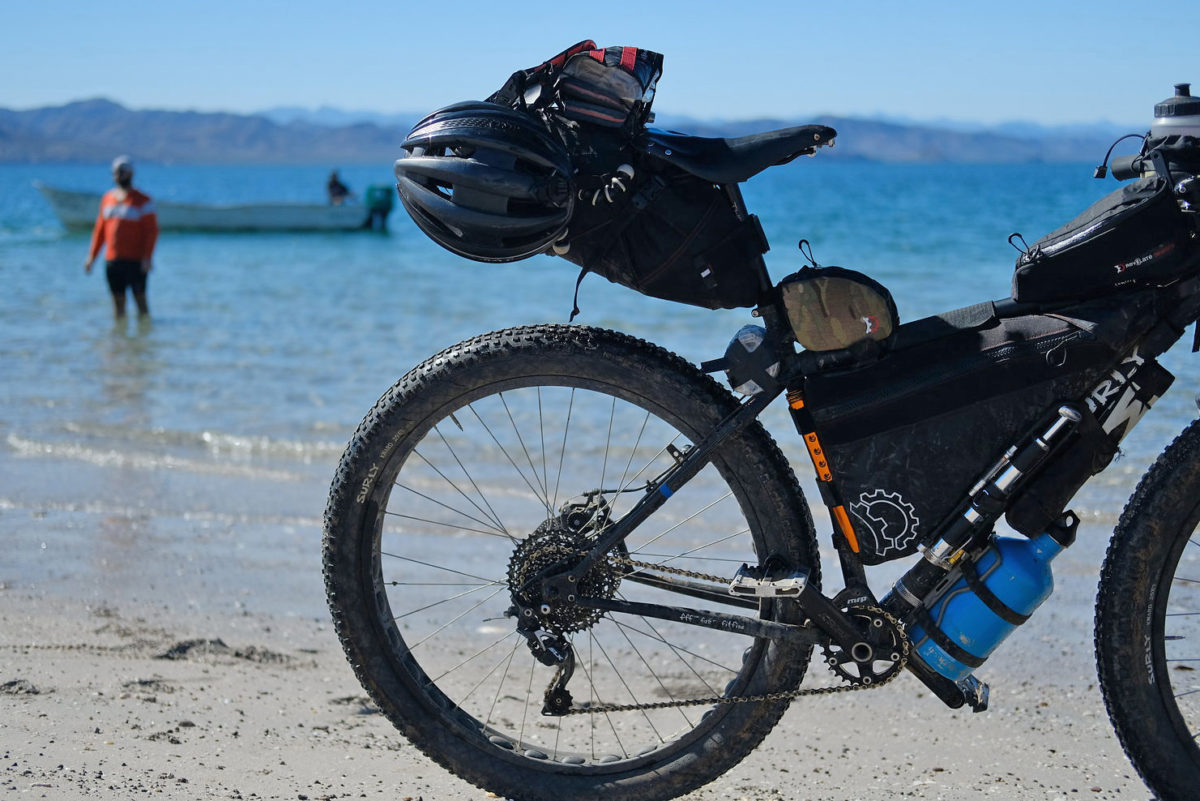
The bad also gets an internal compression strap to secure our packed gear, and external lashing points for when there’s more to carry. It does sit down pretty far from the saddle, so needs a good 5 or 6″ of exposed seatpost and at least 9.5″ between the saddle rails and the rear tire. That meant it was too big to fit Katya’s small frame.
Sweetroll
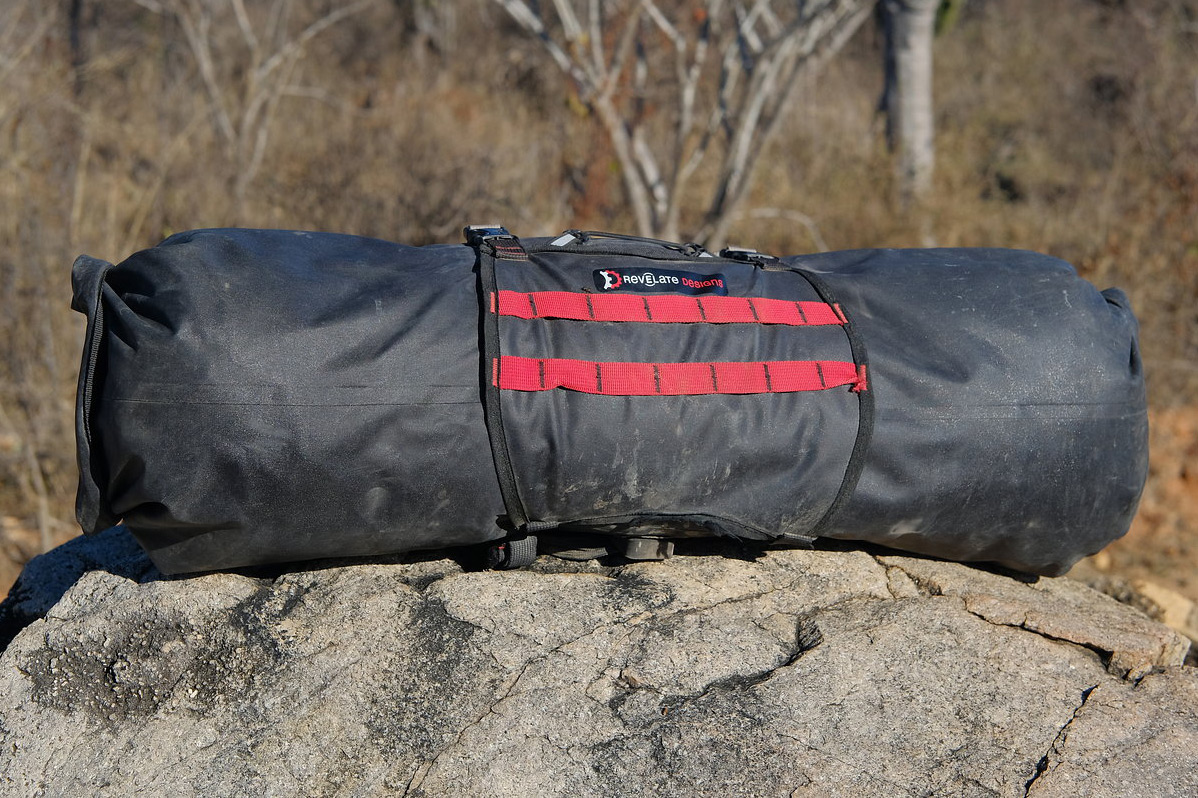
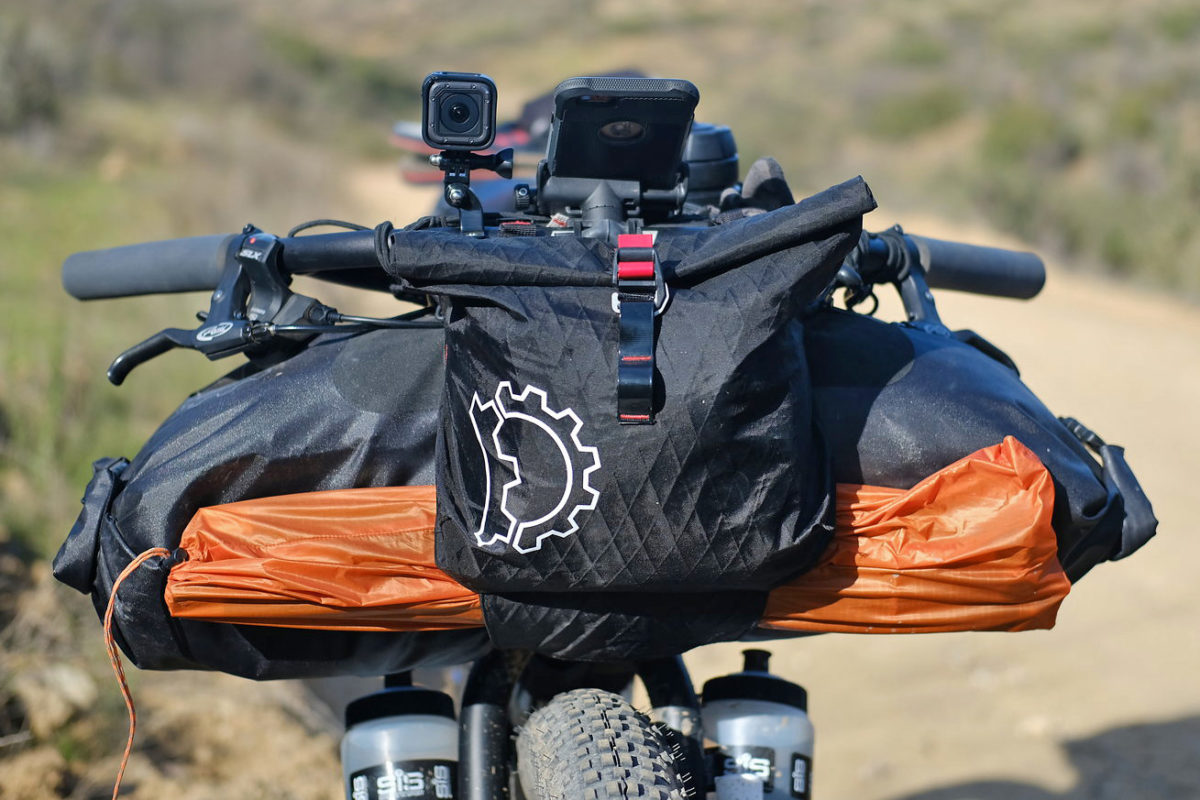
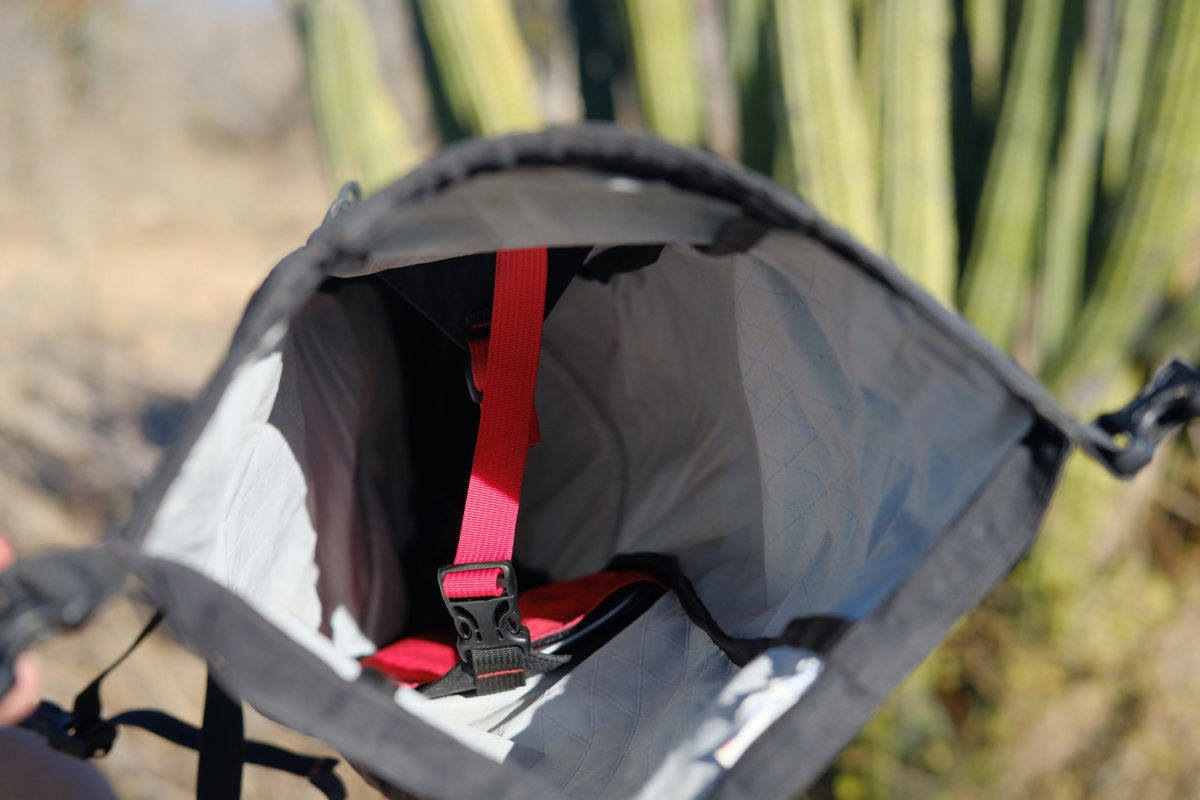
The $110 large Sweetroll handlebar bags that we used are a mix of the multi-part setup. It actually combines the heavy-duty harness & dry bag together, with another reinforced harness across the front of the bag, with it all staying fixed to the bike. The dual sided roll-top dry bag packed a lot (up to 18l), of course staying dry.
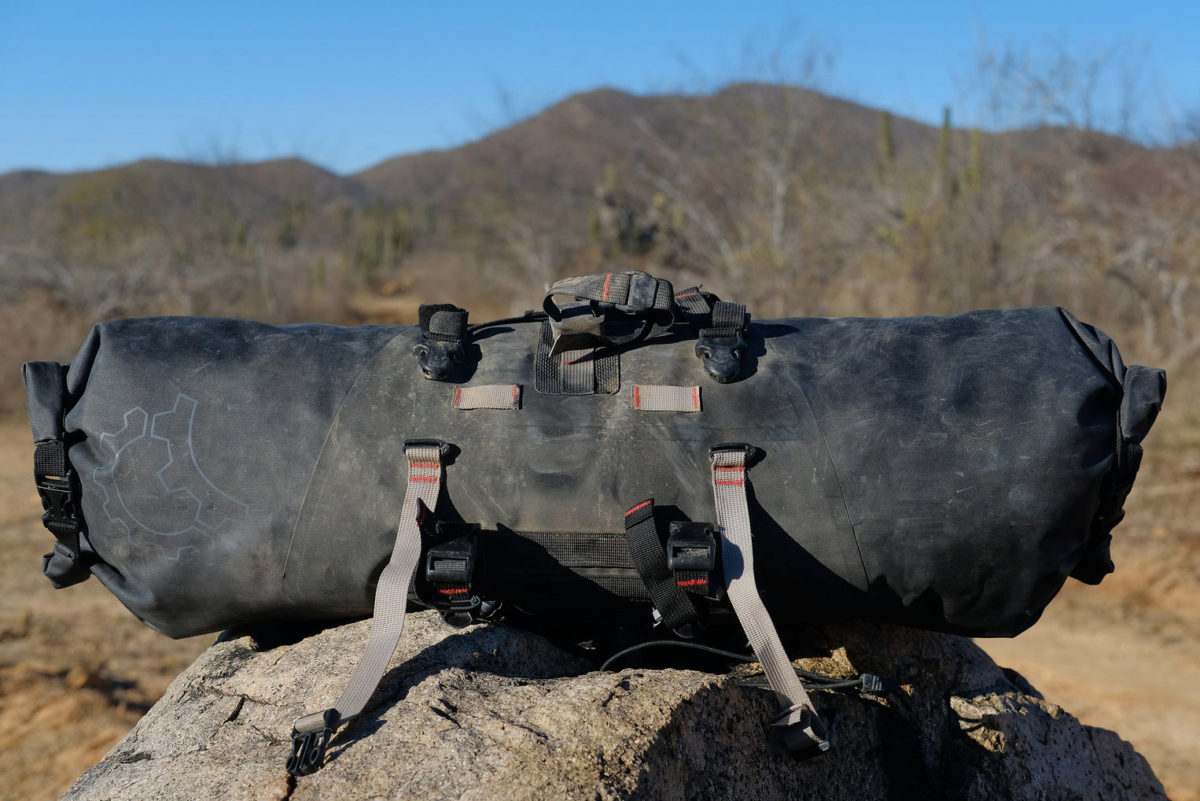
The mounting setup uses 3 rubber blocks offsetting the bag from the handlebar with the possibility to lash back dow to the fork crown for added stability. In between the bag & harness there is room to stuff a jacket, plus a bungee that worked well for hanging wet gear out front to dry as a clothes line.
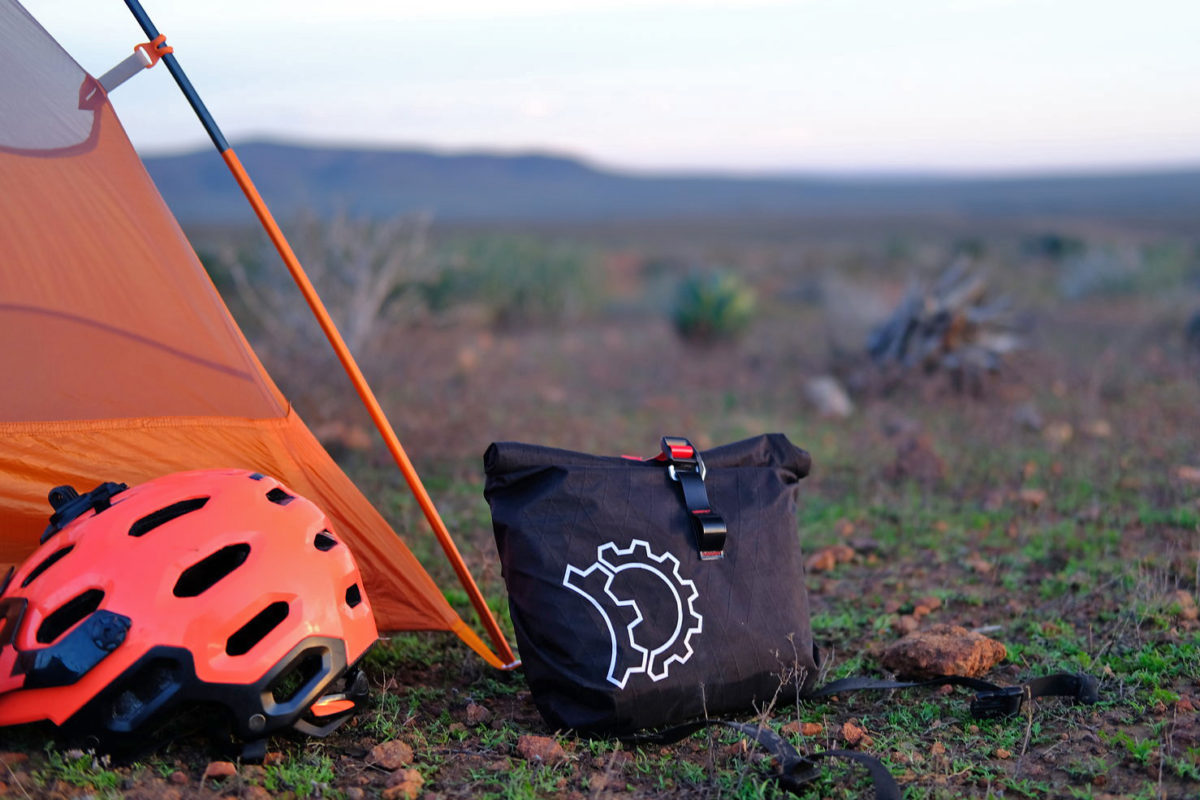
We also had the optional extra $69 Egress Pocket add-on for another roll-top waterproof pouch to secure more gear close at hand (since you can’t access anything inside of the Sweetroll from on the bike.) The Egress also is easy to pull off for around the camp storage too.
Gas Tank
The Gas Tank is a $55 two compartment toptube bag that straps around the toptube and upper headset cup. It does a good job of keeping gear close at hand and at 1.3l in volume (and 2.5″ wide at the stem) is a good bit bigger than other similar bags we tried, meaning it held a pair of full-size camera lenses for us. It uses a ‘one-handed access’ wrap-around zipper that actually gave us some ease-of-use trouble.
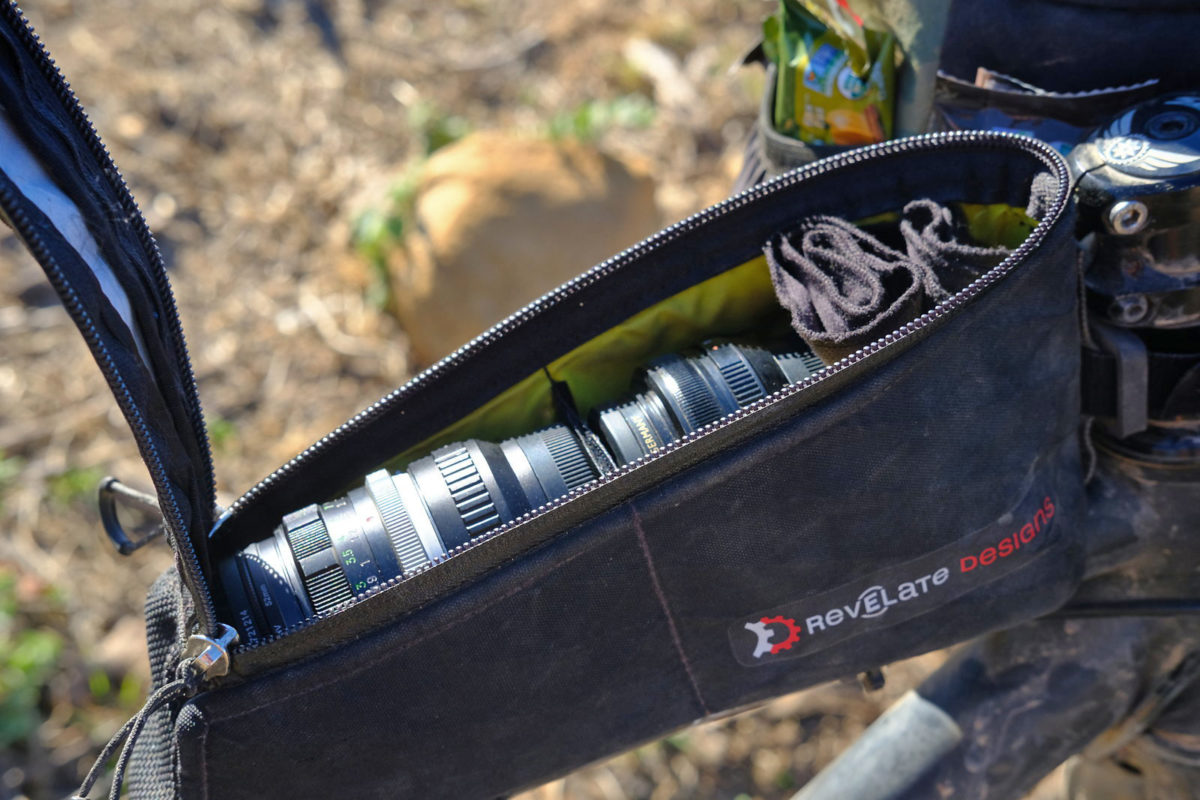
Otherwise the foam padding and yellow lining made for indispensable gear hauling, always at the ready and easy to see into.
Mountain Feedbag
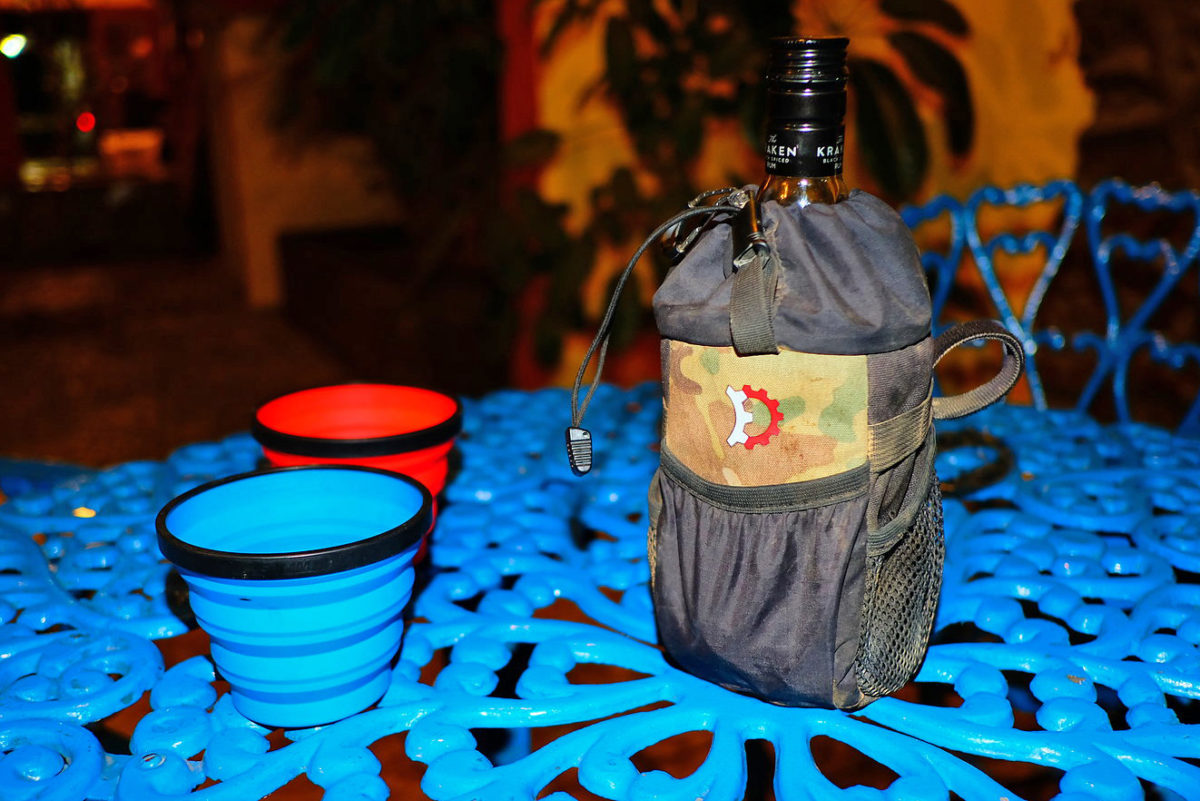
The $49 Mountain Feedbag is at first a strap on water bottle bag, but we used ours more for hauling other random things (notice we have a lot of bottle cages too.) With an expandable top, a cinch-down closure, and foam padded construction the feedbag did its share of hauling shady bottles of liquor along the way, as much as a camera bag. Effectively open-topped for the most part it straps in the bend between bar and stem to make for a true quick-access pocket. We have the newest generation of Mountain Feedbag that includes 3 external mesh pouches that are good for hauling small items like snacks, but also make for great trash pockets. This version is also a pretty big diameter – more than a regular water bottle – so it fits a 1l Nalgene bottle or we’ve heard a 750ml bottle of Kraken rum.
Jerrycan
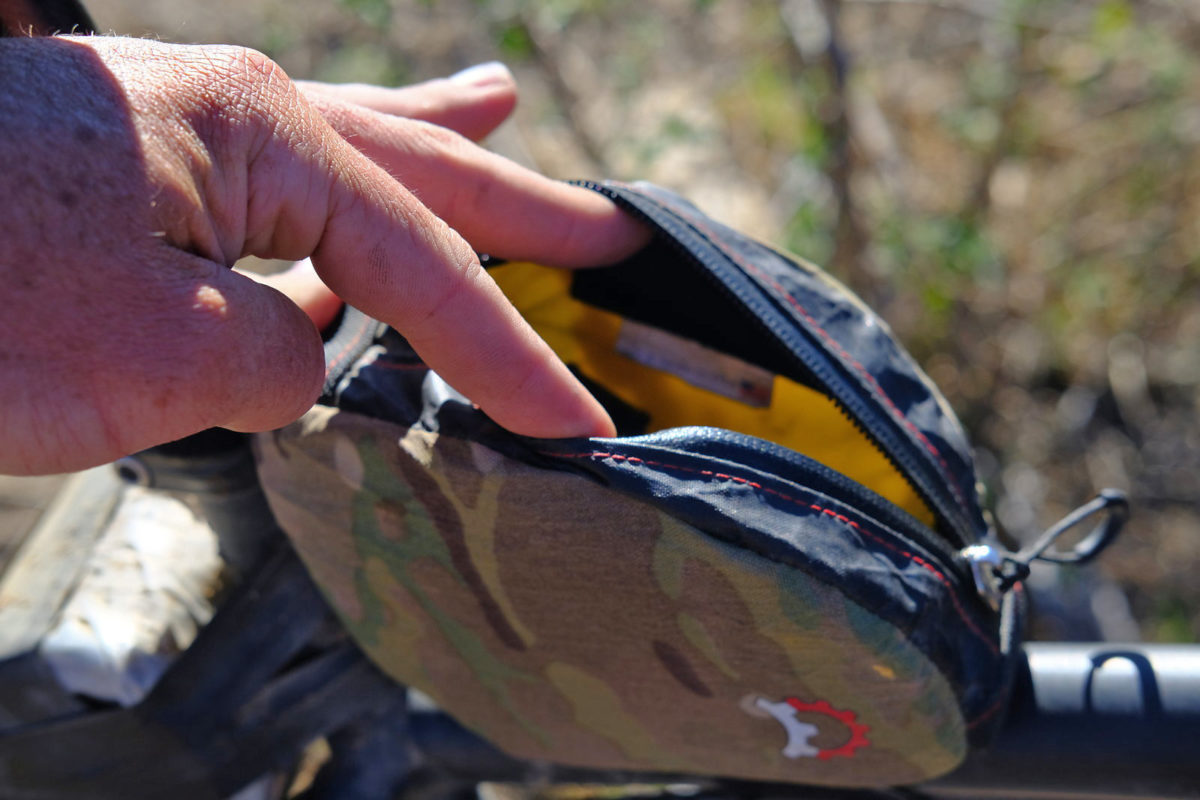
The Jerrycan is basically a rear version of the Gas Tank that straps between the toptube & higher up the seatpost. We used the standard-angled $46 bag mostly for small personal items rather than the repair kit that Revelate intended, but were happy for another small bag that tucked close, but still out of the way. At a narrow 2″ wide we had plenty of clearance, but also noticed that you could remove the plastic internal side support panels which would maybe let you alter its shape smaller or bigger a bit if needed.
Katya

Katya’s size Small Krampus didn’t have as much space (just 4.5″ between the 29×3.0″ tire and her Brooks saddle) so she needed to go with a set of Nano rear panniers on a rack setup instead of a saddle mounted bag, and filled out storage with a Ranger frame bag. So her total package was a small Ranger frame bag, the Nano panniers, a Sweetroll handlebar bag, and a set of Gas Tank, Mountain Feedbag & Jerrycan accessory packs.
Ranger
The small Ranger frame bag sells for the same $150 price as the large, with completely the same features. It does however offer almost exactly half the storage capacity.
Nano Panniers
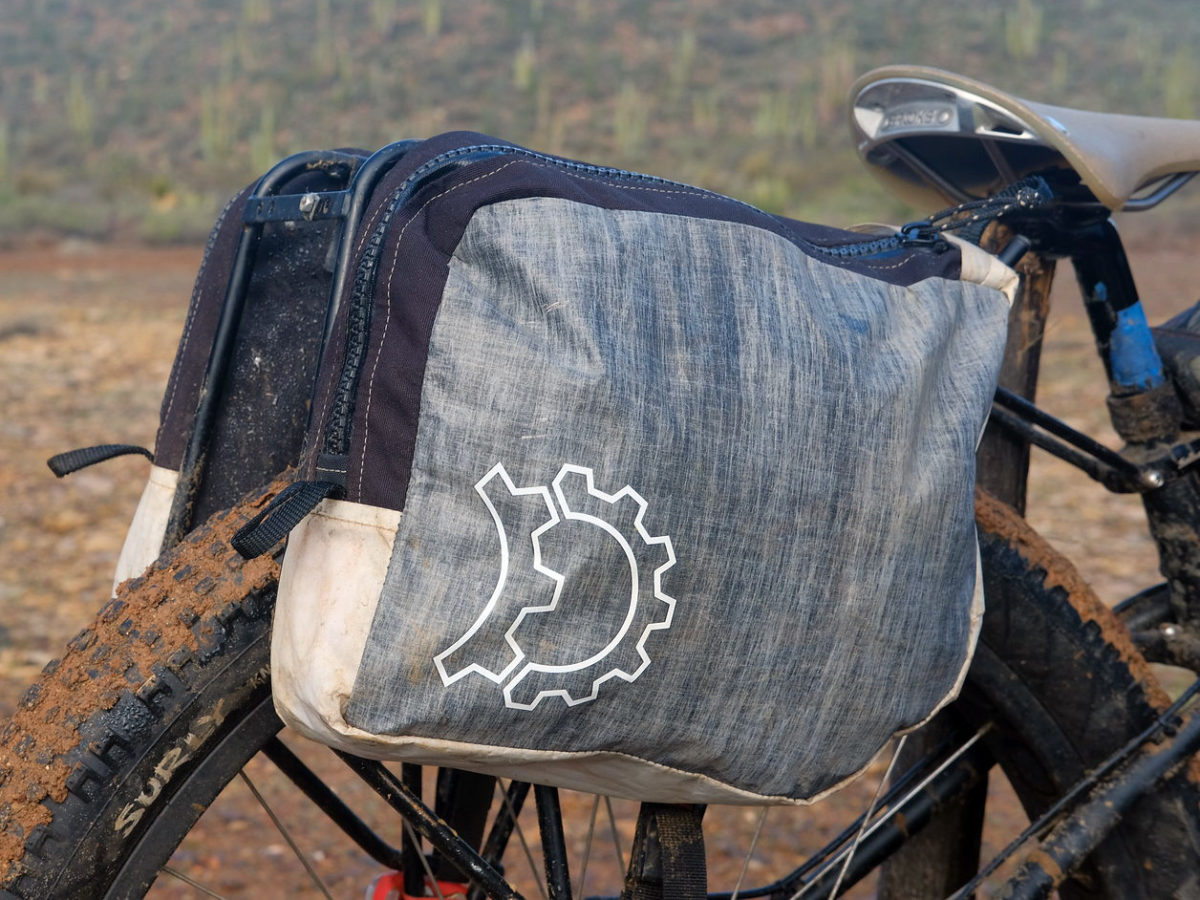
The Nano panniers are a new thing for Revelate and the only item they sell that is rack based. Designed for smaller riders like Katya, they bring back rear storage where a big saddle bag pack just isn’t going to fit, and are kept small so you can actually get off and push the bike (something that normal panniers make really difficult over rough terrain.)
While they look small at only 3″ wide for each bag they did a good job of hauling a bunch of gear packed narrow and close over the rear wheel, with wide cut-to-fit velcro attachment.
Otherwise Katja’s Sweetroll, Gas Tank, Mountain Feedbag & Jerrycan bags were all the same as those on Spencer’s bike, and they didn’t need any unique setup tweaks. There was still plenty of room for a bunch of water bottle hauling on the outside of the frame, stem & fork.
So that’s it on the gear & setup fronts. We pushed the pair off into the desert to ride, and we’ll report back next on how the riders & bags fared over the long haul.