Home > Bike Types > Road Bike

Winter Presscamp 2014- Campy Power Inside: Hands on Campagnolo’s slimmer Internal or External EPS battery

22 Comments
Support us! Bikerumor may earn a small commission from affiliate links in this article. Learn More

Campagnolo internal battery eps launch20140130_0855

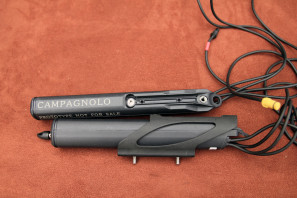
Once Shimano introduced their BTR2 internal battery for Di2, it seems that nearly every manufacturer with a Di2 model is taking advantage of the new found ability to hide the battery out of sight. Campagnolo joined the internal party when they announced a new battery platform around July of last year. More than just an internal battery, the new EPS V2 power unit allows for 4 different mounting options while also reducing the weight.

We got a first hand demonstration of the use and installation of the Power Unit, check out the details next.

Campagnolo internal battery eps launch20140130_0857 Campagnolo internal battery eps launch20140130_0856

Campagnolo lists the V2 power unit as a 4 way fit – externally mounted, in the seat tube either facing up or down, and in the down tube. The external mounting is pretty self explanatory – instead of the rather large original EPS power unit the sleek V2 includes a removable cradle that bolts into the internal mounting holes and provides and adjustable fit when mounted externally to the preexisting mount standard.

Campagnolo internal battery eps launch20140130_0858

Like the original Power Unit, when mounted externally the V2 power unit uses the same magnet to put the system on 6 month standby without having to recharge the battery. Since the battery is mounted externally, it can be installed and removed as normal.

Campagnolo internal battery eps launch20140130_0860

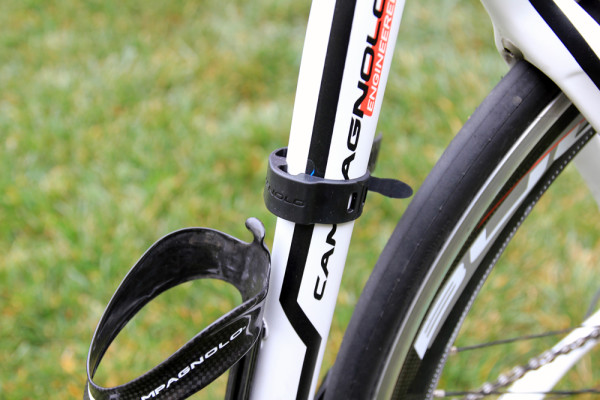
However, when the battery is mounted internally, there is obviously no way to place a small magnet in the battery when it’s stuffed down your bike’s tubes. For internal use, Campagnolo is including a magnet band that is strapped to the tube where the battery resides to place the system in standby. It should go without saying, but this is for when the bike is in storage or being serviced, so you won’t be riding with this on your bike.

Campagnolo internal battery eps launch20140130_0848 Campagnolo internal battery eps launch20140130_0849

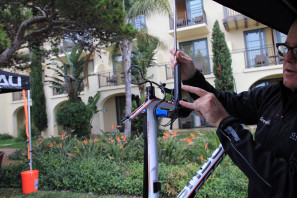
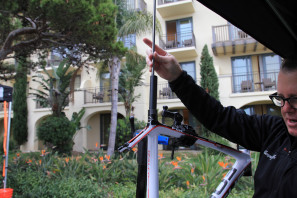
So just how do you go about bolting a battery to the inside of your water bottle mounts? What sounds like an incredibly tedious process is actually surprisingly simple thanks to a few ingenious tools devised by Campagnolo. While Campy NA’s Dan Large has done this many times, the fact that he was able to install a V2 Power unit in about 10 minutes in both the downtube and seat tube was pretty impressive. That’s with the Campy tool kits though, without them you would probably be out of luck.

Campagnolo internal battery eps launch20140130_0850

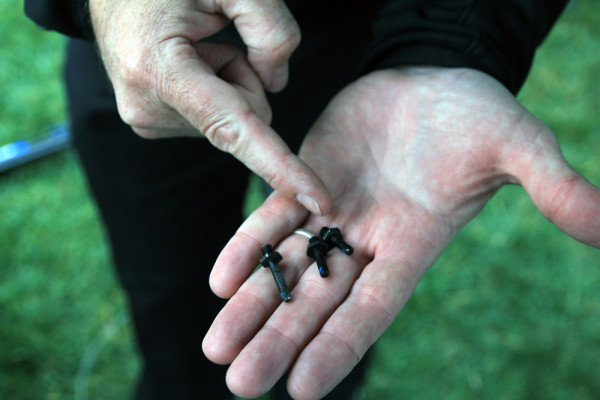
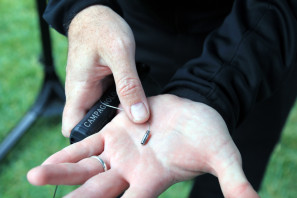
In order to mount the battery in the seat tube Campy has a long rod that is threaded on the end to screw into the battery. The Battery itself has a slot that guides itself onto the threaded studs that a inserted though the water bottle bosses. In order to pull the wires through the frame, there is another tool kit that has a magnet on a wire that plugs into the wiring loom. In order to pull that through the frame there is a shift cable with another magnet shrink wrapped to the cable which when pushed through the frame easily connects with the magnet on the wiring loom allowing you to pull it through the frame to where it needs to be. Apparently, the magnet/wire technique comes from F1 where it is used to pull the wires through the carbon chassis. Pretty clever.

Campagnolo internal battery eps launch20140130_0852 Campagnolo internal battery eps launch20140130_0851

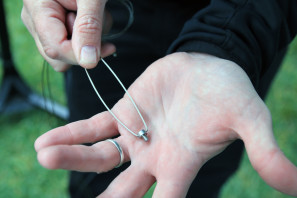
Mounting the battery in the downtube is similar, but because of the angles of snaking it through the head tube, a steel rod can’t be used. Instead, there is a system of two steel wires with the smaller one to the left threading into one of the mounting bosses on the battery, and the one on the right threading into the end of the battery. The process is probably too abstract to explain, but after seeing how it is done, it is incredibly easy with the tool kit (different kits for Athena EPS and Record EPS). The dual wires on the second tool allow for it to be unthreaded from the battery once it is bolted to the frame.

Campagnolo internal battery eps launch20140130_0859

Since the V2 Power Unit is bolted in place, there is no way it will move, rattle, and it will be better sheltered from the elements. On the bottle bosses where the battery is mounted, water bottle cages are attached with a nut instead of the standard bolt.

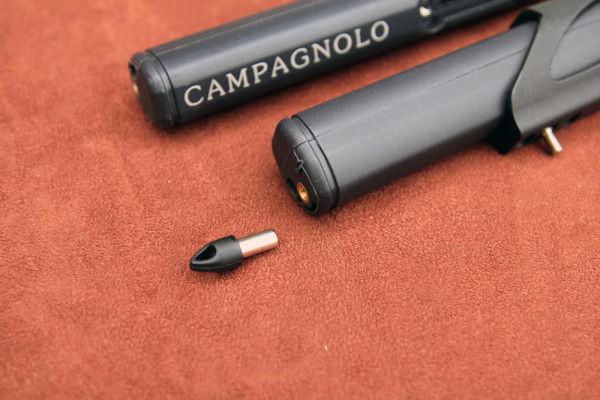
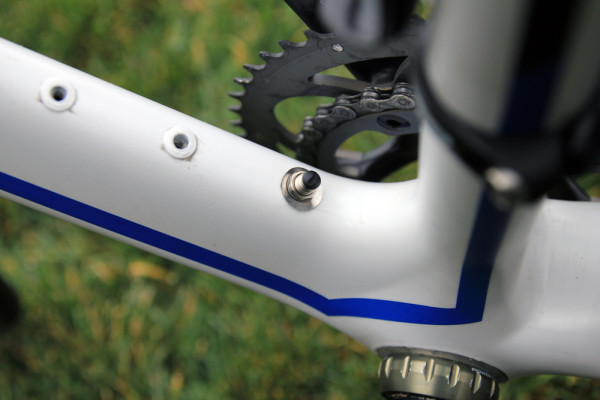
Since the battery is now internal, the question of charging becomes an issue. On the EPS system, the Power Unit is the battery but it is also the heart of the electronics for the system including the diagnostics and charging port. Now, instead of plugging into the battery, there is a new charging nipple that must be installed in the frame somewhere. Campagnolo says that most frame manufacturers are already on board with mounting holes and will accommodate the system going forward. What about upgrading your current system? Dan mentioned that most frames have some kind of a hole (many times on the BB shell) that can simply be widened to 7mm to allow for the charging port.

The V2 Power Unit is fully compatible with previous EPS systems, and will run around $1000 for the upgrade. That price includes the interface, Power Unit, and the charger which are all specific to the internal battery. As far as pricing for the battery with a new EPS drivetrain, the pricing remains the same as the previous power unit. With the new interface, diagnostics are still performed without the need for a computer with everything done through the bike with a system of LED lights to indicate performance or errors.

Campagnolo internal battery eps launch20140130_0853 Campagnolo internal battery eps launch20140130_0854

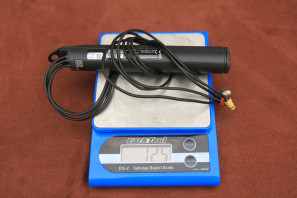
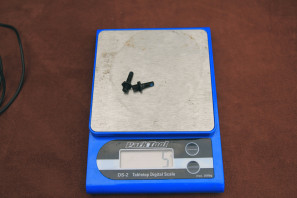
Running about 15% lighter than the previous power unit, the battery weighs 125g and about 5g for the mounting hardware. Because of the smaller size though there is a slight decrease in battery life – from about 2200km to 1700km or about 1200 miles.

Campagnolo internal battery eps launch20140130_0863

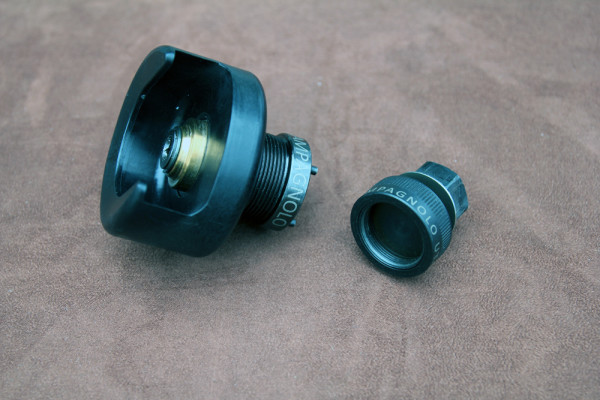
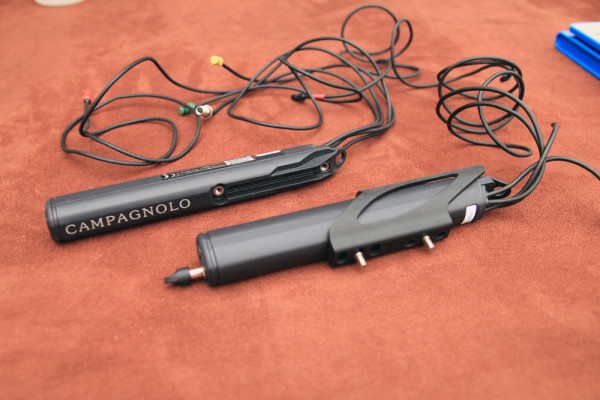
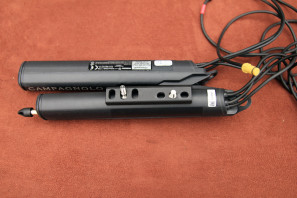
While we’ve already had the chance to check out the Campy Over Torque BB30 crankset which is their lightest crank with the narrowest q-factor, for those of us who get excited by tools, especially Campy tools, we had a chance to check out the new Over Torque installation and removal tools. As Dan puts it, these proper Campy tools make the installation and removal of the cranks a breeze and actually aren’t too expensive for a shop to purchase. The tools install the crank, install the spindle nut, and remove the crank without leaving a scratch.
Subscribe
Notify of
guest

This site uses Akismet to reduce spam. Learn how your comment data is processed.

22 Comments
Oldest
Newest Most Voted
Inline Feedbacks
View all comments
Rob D
Rob D
10 years ago

Wow, Can you imagine if the invented a bicycle pump.

joenomad
joenomad
10 years ago

Di2 is specific to Shimano as EPS is to Campy. Not interchangeable.

Andrew
Andrew
10 years ago

The problem I have with campy is that they don’t make EPS as easy to work on as Di2. The cables are all hard wired into the components on one side, which means that if one cable gets damaged I have to replace the whole (expensive) part for the sake of $.25 worth of wire. Then, if a pin gets damaged on the charging plug, I have to replace the whole battery. Both of these have happened on customer’s bikes. When we finally get a new battery installed, we have to go through the hassle of campy’s convoluted set-up. Shimano makes it simple – just use your computer.

As for those tools that “actually aren’t too expensive for a shop to purchase,” they cut my margin in half on a boutique crankset – assuming I can even get MSRP for it. Campy’s parts have leaked into on-line discounters in a big way recently. A little google-sluthing and my customer might be able to get a Comp Ultra crankset for 15% more than I pay. In that case, I’d go underwater selling a crankset and installing it. Campy really didn’t need to design new tools for OverTorque, they could have easily used existing standards for BB30. That’s just one example of how campy gives us (the retailer) the shaft after we’ve been vocal proponents of them for years. I’ve got nearly seven grand in campy tools, two 50th anniversary groups, and no respect for the company or their products anymore.

DesertRat53x11
DesertRat53x11
10 years ago

As a mechanic I cringe when I see stuff like this come out. Booooooo!

Eyal
Eyal
10 years ago

Gonna have to till V3 or V4 comes out. I’m campag for life, but this solution is too complicated and too expensive and somewhat experimental.

David
David
10 years ago

Here is the Campag video explaining the pita.
https://www.youtube.com/watch?v=3hIhwWobxjw

After watching some of that battery mount video, I can’t help but wonder why bother with seat tube battery? Wouldn’t a smaller battery work inside a drop bar? I’m guessing maybe a 1000Km capacity each, so maybe 2 batteries would be required. So just one special snake tool required for wiring them together or just use a brake cable thru a drop bar. The magnet on/off port could be on the left side barend plug and a recharge port (for both batteries) could be on the right side barend plug. Or maybe combine the magnet plug somehow with the recharge port? This would be easier to recharge and reduce a lot of the installation headache this video entails.
As a 2nd idea, how about a simpler external battery, but with through holes where it could be sandwiched in between a bottle cage and a frame. I believe that Campagnolo used that format while still in the prototype development stage. Bottle cage mountable is much more universal, plus this would help triathloners/non-traditional frame compatibility.

Jack
Jack
10 years ago

Still seems like a gateway to insanity durring instalation.

Andrew
Andrew
10 years ago

I have retro-fitted the new internal battery to 3 bikes that were previously running V1 EPS.

Works a treat. No difference in performance, and surprisingly easy to fit.

But the charging method is nuts! I don’t have any spare holes in the frame (how many frames do you know that have random holes drilled into them?). A hole in the bb does not have the clearance above it to allow the wire to protrude internally. I am not about to drill an extra hole and void my warranty.

Therefore I have had to run the wire up to my seat post and keep it in place with a piece of foam. Charging does not happen that often, and when it does i just remove the seat post. Not too much of a headache in the end, but not perfect, which it should be for that money.

This is streets behind the Di2 alternative where you can charge through the already external stem mounted unit.

V1 was better thought through than this. Can;t help thinking that V3 will be more like Di2 in this respect. This is very compromised.

Psi Squared
Psi Squared
10 years ago

While you’re there, please probe the Campy people about any plans they might have for wider wheels.

David
David
10 years ago

After watching some of that battery mount video,
https://www.youtube.com/watch?v=3hIhwWobxjw
I can’t help but wonder why bother with seat tube battery? Wouldn’t a smaller battery work inside a drop bar? I’m guessing maybe a 1000Km capacity each, so 2 batteries would be required. So just one special snake tool required for wiring them together or use a simple inner brake cable. The magnet on/off port could be on the left side barend plug and a recharge port (for both batteries) could be on the right side barend plug. Or maybe combine the magnet plug somehow with the recharge port? In my opinion this would be easier to recharge and reduce a lot of the installation headache this video entails.
As a 2nd idea, how about a simpler external battery, but with through holes where it could be sandwiched in between a bottle cage and a frame. I believe that Campagnolo used that format while still in the prototype development stage. Bottle cage mountable is much more universal for triathloners/non-traditional frame compatibility.

Gumby
Gumby
10 years ago

WHY?
WHY BOTHER WITH CAMPY?
WHAT IS THE UPSIDE?

Shimano doesn’t need a battery port for recharging
you can do it through the junction box or either of the derailleurs
.
See also Calfee
1st to hide the battery
1st to hide the junction box CLEAN FRONT END
Shimano, and therefore Champy, copied seat post battery install from Calfee. FULL STOP PERIOD

both are now 18 months behind the curve!
” SEE THE FUTURE install the past… buy Champy?”
taking off your seat post sure, but why bother? Cause you love Champy ??
Lets talk battery power for Blue tooth? talk heated grips heads up computer display in sun glasses … Shimano battery is already being used by mtb ers to raise and lower seats and select shock settings… push the envelope don’t embrace the past…
You guys are sooo 2014

alb
alb
10 years ago

…and breathe ^^^

dislivello
dislivello
10 years ago

I want As cars. One battery for all accessory. One standard .why peopke don t talk?

Cymacyma
10 years ago

Finally, Campy’s gonna chimps =3 SAD

Collin
Collin
10 years ago

Why can’t they put a charging port right on the shifters? If the current is low enough, the signal wires would be able to handle it. Who cares about slow charging times if it takes 1200 miles to drain.

Alb
Alb
10 years ago

@Collin – I think a certain Japanese co. have some very strategic patents in regards to charging which result in the hamfisted effort you see above.

DC
DC
10 years ago

oh god, stick to mechanical campy…

Carl
Carl
10 years ago

Yup… it’s all done with magnets!

Graeme
10 years ago

To answer some of the comments above: I am head tech at Campagnolo’s main UK Service Centre …

But …. having said that I am also a jobbing mechanic and work on everyone’s sytems, all the time – I just spend more time with Campagnolo. We are under contract to Vicenza but we are not part of campagnolo nor do we sell components – we only look after tech training, service & warranty.

Random holes in frames – most “electronic ready” frames have 2 x m4 riv nut mounts for externally mounting the Di2 battery or EPS Power Unit – if you are doing an external instal, you don’t need these, so a riv nut can be drilled out and the charge / data port installed there. So no extra hole and if you ever want to re-instate the riv-nut, it’s a normal procedure for any competent mechanic. We do it all the time for guys who get bottle cage boss bolts stuck, or have riv-nuts that come loose in the frame.

Why no industry sytandard battery? The EPS PU is not just the battery, it also houses part of the system software.

Why no set of plus-in cables? In Northern Europe it gets wet, wet, wet … the fewer breaks there are in the wiring loom,, the lower the chances of water ingress. We have seen Shimano systems drown a lot more often than Campag (although in Shimano’s case it is still not at all common) – in Campag’s case, the only issues we have seen with water getting in so far are if the PU case or lever body gets, compromised. Proper attention to installation means that you won’t damage a pin in the plgs – the damage to cabling is a good point though – in practice, rare though.

Why no Shimano junction-box-style charge point? Shimano patent plus Campag use a common entry point for data and power – we don’t have, at the dealer level, any need at this stage to allow data access but keeping the format & again mimising the number of breaks in the wiring loom is preferable and keeps options open for the future.

Complexity of set up? Are you kidding? Teach the system where two sprockets and the inner chainring are, set the low limit screw on the RD and that’s job done? In practice no harder to do than Shimano, a very similar procedure in fact – plus no need to opt for software changes to single shift / multi-shift, no external diagnostics package (it’s all on-board – not in the charge port as the article implies) … can’t see that one at all.

Overtorque tool and associated costs – yes, the tool does cost some money, yes we do need it – but once you have it, you have it for good & Campag don’t make a habit of frequent turnover of designs … there is no standard as such for BB30 and related systems that doesn’t compromise stance width and angle clearance – OverTorque is designed to be one of the lightest high-production crank sets in the market (OK, there are some lighter boutique brands), plus it has a bearing system that is second to none – and at least Campagnolo have looked at the whole oversize BB question afresh and have tried to make the best of what in engineering terms is a really bad idea – press fitting into a BB shell was a lousy idea when Viscount bought us the Lambert BB in the 1970s and at least this part of engineering hasn’t changed much since. I do hear and sympathise with the margin problem, though. Incomplete solution though it is – you could always charge for fitting cranks bought mail order – a lot of UK dealers do just that now and not only on Campagnolo kit …

Sorry for the long post, but there is a lot still not well understood about Campagnolo in the market – yes, they have their foibles, but to me, having been spanneringat every level from shop to pro-team, instructor to student, for more years than I care to think about, so do Shimano, SRAM and every other component manufacturer out there – and just because a mechanic is familiar with another manufacturer’s way of doing things, it doesn’t make it the only way, or indeed the best way …

Bill
Bill
10 years ago

So… Does it come with the magnet?

Fizgerald Joseph
Fizgerald Joseph
9 years ago

I have a question really. I have the eps v2 system and it works perfectly. My only concern I have is to know when will my battery quit? How do I check my battery life. When I press the buttons on the left and right levers for a quick touch I get the green light. I am thinking that is telling me that my battery is still working or I have some more to go. I thought that while I am riding the red light would indicate to me that my battery was going out but it didn’t. I am thinking now that maybe if you want to know when your battery is going out you should press any buttons on the levers and that will then indicate green or red. If its green then you have some charge but if gives you a red then its time to charge. Another question would then be how many miles will the battery gives me once I get a red light? If this is the case then after every ride after a 1000 miles you will need to check you light status. I am scared after been left in a hilly area on 53×11 and my battery quit on me so I just charge after every 1000 miles or once a month. Any answers for me?

Al
Al
9 years ago

Battery life? Charging once every 28 days should be sufficient for all but major mile munchers. I do about 1200km per 28 days. It’s good for min. 500 recharges, so that’s, wait, I can’t even do the maths. 38 years, 600,000km? So the message would be, charge it more often, maybe every fortnight. I can’t think of any components offering that lifespan. As for the charge level, Red means between 20 & 6% power remaining. Your last warning is flashing red!

Subscribe Now

Sign up to receive BikeRumor content direct to your inbox.

Subscribe Now

Sign up to receive BikeRumor content direct to your inbox.